
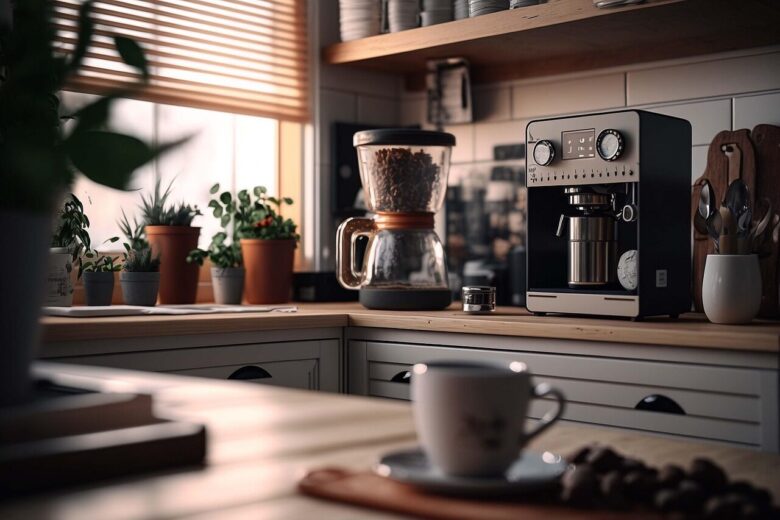
A coffee corner does not need a separate room, custom cabinetry or a collection of matching appliances. In a small kitchen, the most inviting setup is usually the one that removes friction: the mug is easy to reach, the grinder has room to operate and the kettle can be filled without moving three decorative objects.
Coziness comes from order, texture and a sense that the space belongs to your routine. The goal is not to display every coffee tool you own. It is to give the tools you use most often a safe and pleasant home.
Choose the location before choosing the décor
Walk through your normal coffee routine once without reorganizing anything. Notice where you collect water, grind beans, dispose of grounds and place the hot brewer. The best corner shortens those movements without blocking food preparation.
Prefer a position near a suitable wall outlet so cords do not cross the sink, stove, walking path or edge of the counter.
Kettles and coffee machines need the clearances required by their manufacturers rather than being pushed tightly beneath shelves.
Avoid the only chopping area, the space directly in front of a frequently opened cabinet or the route to the refrigerator.
Divide the corner into four working zones
A narrow counter becomes easier to manage when every section has a single job. The zones can overlap, but the brewing surface should remain open enough to place a scale, cup or hot carafe safely.
Active coffee bag, filters, scoop and the sweetener or additions used every day.
Grinder, scale and an empty area where beans can be measured without spilling around other appliances.
Kettle, coffee maker or manual brewer with enough open space for steam, filling and serving.
Mugs, cloth, grounds container and a direct route to the sink or waste bin.
Three layouts that work in genuinely small kitchens
Arrange the coffee, grinder, brewer and mugs from left to right in the order used. This layout works well when you have a narrow but uninterrupted section of countertop.
Keep the machine and grinder below while filters, cups and lightweight supplies move onto a wall shelf, rail or cabinet organizer.
Place manual-brewing supplies in one stable tray or shallow basket. The complete setup can move when the counter is needed for cooking.
Measure the equipment in its working position
Appliance dimensions on a product page describe the machine at rest. Brewing may require more room to open a lid, remove a water tank, raise a lever, insert a portafilter or pour water into the top.
| Measurement | What to include | Why it matters | Common oversight |
|---|---|---|---|
| Counter width | Appliance body plus working room for the scale, cup and hand movement | Prevents the station from consuming every usable centimeter | Measuring the machine while ignoring the grinder and coffee bag |
| Counter depth | Machine, plug, cord bend and access to removable parts | Keeps hot equipment away from the counter edge | Pushing the appliance against the backsplash until its cord is compressed |
| Working height | Open lid, raised lever, removed bean hopper or lifted water tank | Confirms whether the appliance can operate beneath a cabinet | Discovering that the reservoir cannot be filled without moving the machine |
| Outlet distance | The appliance’s original cord without stretching or crossing wet areas | Reduces dependence on extension cords and awkward routing | Designing the station first and solving electricity afterward |
| Door and drawer swing | Cabinets above, drawers below and nearby refrigerator doors | Keeps the coffee corner from blocking kitchen storage | Placing the machine beneath the cabinet used for breakfast dishes |
| Daily mug clearance | The tallest cup, travel mug or carafe used regularly | Ensures the drink can be prepared without tilting a hot container | Testing only with a small espresso cup |
Make the corner safe before making it beautiful
Coffee equipment combines heat, electricity, water and repeated hand movement. A compact layout should reduce those conflicts rather than hide them behind attractive storage.
Follow the appliance instructions and avoid overloading power strips or treating an extension cord as permanent kitchen wiring.
Do not place cords where they can touch hot surfaces, cross standing water, become pinched or hang where a child or pet can pull them.
Use a removable reservoir or separate vessel when possible instead of carrying an overflowing kettle across connected appliances.
Keep paper, cloth, plants and wooden décor away from steam outlets and hot surfaces according to the manufacturer’s guidance.
Espresso machines, grinders and full kettles belong on stable surfaces rather than lightweight carts or narrow floating shelves.
Stop using appliances with cracked, loose, scorched or otherwise damaged electrical components until they are properly repaired or replaced.
Use the wall without turning it into clutter
Store light items such as filters, tea, a small canister or rarely used cups.
Useful for a few lightweight mugs when the hardware is rated and installed correctly.
Hold a brush, cloth or small measuring tool without occupying the preparation surface.
Keep paper filters or instruction cards hidden while preserving shelf space.
Suitable only for compatible lightweight metal tools, away from heat and electronic controls.
Leaving part of the area blank can make a compact station feel calmer than filling every level.
Shelves should not prevent a kettle lid from opening or trap steam against cabinetry. Keep frequently handled items low enough to reach without leaning over hot equipment.
Store coffee for freshness, not for display
Use an airtight, opaque container or a well-sealed original bag. Place it in a cool location away from the oven, dishwasher and strong sunlight.
They may look attractive, but light and heat work against freshness. Décor should not turn the coffee itself into decoration.
A small bag used regularly occupies less space and stays fresher than several open coffees waiting for occasional attention.
Keep the active bag at the station and unopened reserves in a suitable pantry location rather than crowding the counter.
Add warmth in layers, not in piles
A comfortable corner can feel finished with only a few visual decisions. Choose one element from each layer instead of buying several objects that perform the same decorative job.
One wooden tray, cork mat or woven basket adds warmth without covering the entire counter.
Display the mug, brewer or kettle that is genuinely used rather than a decorative duplicate.
Use existing under-cabinet lighting or a safely positioned fixture that does not crowd the outlet.
A small print, recipe card or framed photograph is enough to give the corner an identity.
Choose one small plant or another easy-to-clean object, kept away from heat and steam.
Create a calm palette from what already exists
The corner should look connected to the kitchen rather than imported from a different house. Start with the cabinet, countertop and appliance colors already present.
Choose one warm material, one accent color and one consistent finish for small accessories. For example, a wood tray, muted green cloth and brushed-metal tools create more coherence than buying every item from the same branded collection.
Matching is less important than repetition. Two or three repeated materials make a small station feel intentional, while many unrelated finishes make it appear crowded.
Upgrade in the order the space actually needs
| Priority | Low-cost action | Why it helps | What can wait |
|---|---|---|---|
| 1. Clear the surface | Remove appliances and supplies not used for daily coffee | Creates immediate working room without purchasing storage | New trays and organizers |
| 2. Group the routine | Reuse a shallow tray or basket already in the home | Makes manual-brewing tools movable and easier to return | Custom cabinetry |
| 3. Improve access | Move mugs or filters into the nearest available cabinet | Reduces unnecessary movement and counter clutter | Decorative mug trees |
| 4. Add vertical storage | Install one properly supported shelf or organizer | Moves lightweight supplies upward while keeping heavy equipment stable | A wall filled with open shelving |
| 5. Add atmosphere | Introduce one cloth, print or natural-texture item | Creates warmth after the workflow already functions | Multiple signs, plants and themed accessories |
Build a layout for your available counter
Enter the usable width and select the main equipment. The result is a planning estimate, so measure the actual appliances—including open lids and removable tanks—before rearranging the kitchen.
Keep the three appliances in a line and move coffee, filters and mugs above or inside the nearest cabinet.
A seven-day corner reset
Building the station gradually prevents the common mistake of purchasing organizers before knowing what needs to be organized.
Make coffee normally and record every item touched.
Check width, depth, outlet position and open-lid height.
Clear duplicate cups, old coffee and unused appliances.
Place tools in the order they are used.
Move lightweight and occasional items off the counter.
Add one useful texture, print or accent color.
Brew again and remove anything that interrupts the flow.
Can I create a coffee corner without permanent shelves?
Should the station be beside the sink?
Can I place a coffee machine under an upper cabinet?
How many mugs should stay at the station?
A cozy corner should make the kitchen feel larger
The best small coffee station does not call attention to how many accessories fit into it. It creates a calm pause in the room and makes the next cup easier to prepare.
Begin with safe access to electricity, water and open working space. Keep heavy equipment stable, place daily supplies within reach and move occasional objects upward or out of sight.
Only after the routine works should the corner receive its visual identity. One warm material, one repeated color and one meaningful object can feel more personal than an entire counter filled with themed décor.
Storage and household-safety references
- U.S. Fire Administration — Appliance and Electrical Fire Safety . Official household guidance covering damaged cords, unplugging small appliances and safe use of electrical equipment.
- Electrical Safety Foundation International — Extension Cord Safety Tips . Safety guidance covering overloading, exposure to water and the use of extension cords as temporary rather than permanent wiring.
- National Coffee Association — Storage and Shelf Life . Coffee-storage guidance recommending protection from air, moisture, heat and light, including avoiding locations near ovens, dishwashers and strong sunlight.
The external references above were active and accessible during this editorial review. Appliance clearances, electrical requirements and mounting limits vary, so manufacturer instructions and applicable local safety rules take priority over general decorating advice.

The Bruxa Coffee editorial team creates practical guides, brewing resources and interactive coffee tools designed to help readers brew better coffee at home. Our content focuses on clear explanations, reliable information and hands-on brewing knowledge for coffee enthusiasts of all experience levels.