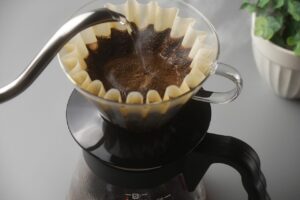
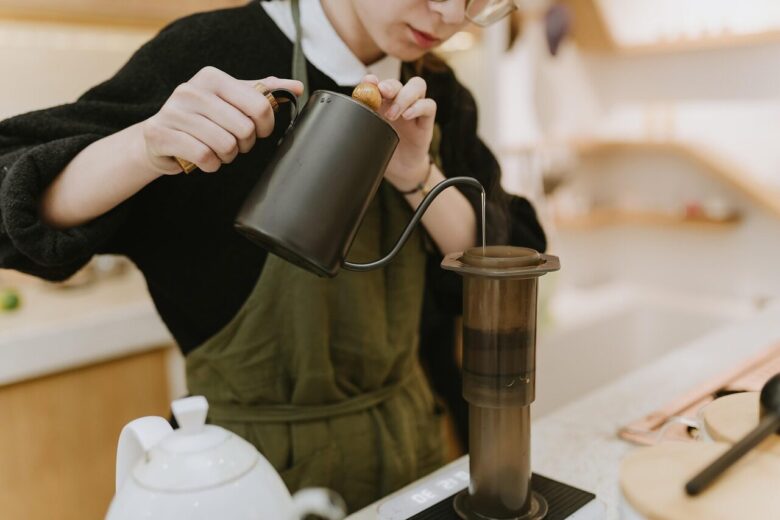
A beginner coffee setup does not need to resemble a café counter. It needs to perform a few jobs reliably: grind the beans appropriately, measure a repeatable recipe, heat suitable water and use a brewer that fits the way you actually live.
The easiest way to waste money is to buy accessories before deciding which brewing method will become part of your routine. A beautiful pouring stand, smart thermometer or collection of glass servers cannot compensate for an inconsistent grinder or a brewer you dislike using.
Build a working system, not a collection
Every useful starter setup controls five basic parts of the process. The exact products can change, but the jobs remain the same.
A burr grinder creates an adjustable grind suitable for your chosen brewing method.
A scale makes the amount of coffee and water visible instead of relying on changing scoops.
A kettle or dependable automatic brewer supplies water at a useful and repeatable temperature.
A filter, press, basket or other brewer determines contact time, texture and cleanup.
A brush, cloth and suitable cleaning routine prevent old oils from becoming part of the next cup.
What to buy now, later and possibly never
Choose one brewing path before shopping
There is no universal beginner brewer. The best choice is the one whose capacity, cleanup and level of attention match your mornings.
| Brewing path | Best suited to | Minimum setup | Main limitation |
|---|---|---|---|
| Automatic drip | People who want several cups with little manual work | Reliable brewer, filter, grinder and scale | Less direct control over pouring and water delivery An SCA-certified model can be a useful reference when comparing automatic brewers. |
| Pour-over | One or two cups with hands-on control and clean flavor | Dripper, filters, grinder, scale and kettle | Requires attention to pouring and repeatability |
| Immersion brewer | Beginners who want a forgiving manual method | French press or another immersion brewer, grinder, scale and ordinary kettle | May produce more sediment or a heavier texture |
| Moka pot | Concentrated coffee for drinking straight or with milk | Moka pot, grinder, scale and stovetop | Heat management can create harshness when the brew runs too aggressively |
| Espresso | People who specifically want short shots and steamed-milk drinks | Espresso machine, espresso-capable grinder, compact scale and basket tools | Highest cost, maintenance and learning demand |
The core tools, in practical order
A brewer that matches the number of cups you make
Start with capacity and cleanup rather than prestige. A single-cup pour-over is inconvenient for a household that needs a full pot every morning. A large automatic machine is unnecessary for someone who prepares one careful cup after lunch.
Check the cost and availability of replacement filters, whether the brewer fits beneath your cabinets and how many separate parts require cleaning. A simple brewer used daily offers more value than an impressive one stored in a cupboard.
An adjustable burr grinder
Different brewing methods need different grind sizes. Espresso requires fine particles and very small adjustments, while French press and cold brew generally use a much coarser setting.
A burr grinder crushes coffee between two abrasive surfaces and allows the distance between them to be adjusted. A blade grinder chops unpredictably for as long as it runs, making it harder to reproduce the same particle distribution.
A beginner does not need the most expensive grinder available. The important features are a useful adjustment range, acceptable consistency, manageable retention and a cleaning process you are comfortable performing.
A digital scale that fits beneath the brewer
A scale turns “one scoop and some water” into a recipe you can repeat. It also lets you compare coffees fairly because the dose and water amount remain visible.
For filter coffee, a general kitchen scale may be enough when it responds quickly and comfortably holds the brewer and server. A compact scale with finer resolution becomes more important for espresso because the dose and beverage yield are smaller.
A built-in timer is convenient but not essential. A phone timer can perform the same job while you learn.
A safe and suitable way to heat water
An ordinary electric or stovetop kettle is enough for French press, AeroPress-style immersion and many simple manual recipes. A gooseneck kettle becomes more useful when the method depends on directing a narrow stream into specific areas of the coffee bed.
Temperature control is convenient for repeating experiments, but it is not the first feature every beginner needs. A basic kettle and a consistent routine can make excellent coffee.
Automatic coffee makers handle water heating internally. In that case, brewer performance matters more than buying a separate specialty kettle.
Fresh coffee and sensible storage
Equipment cannot create aroma that has already faded from old ground coffee. Whole beans allow you to grind close to brewing and adjust the particle size for the method.
Keep the coffee sealed and protected from heat, moisture and strong surrounding odors. The original resealable bag is often sufficient. A separate container is useful only when it closes reliably and does not encourage you to buy more coffee than you can finish.
Buy smaller amounts while learning. Testing several fresh coffees is more educational than storing one oversized bag for months.
How much grinder do you actually need?
Suitable for one or two filter brews when you do not mind turning the handle. It can offer strong grind quality for the cost, but larger doses and very fine espresso grinding may become tiring.
A practical choice for drip, pour-over, French press and cold brew. Confirm that the adjustment range matches the methods you intend to use rather than assuming every burr grinder handles espresso.
Espresso needs fine particles and small adjustment steps. A grinder marketed only for general coffee may move from a fast shot to a stalled shot without a useful setting between them.
Flat and conical burrs can both produce good results. Burr geometry matters less to a beginner than adjustment range, build quality, consistency, maintenance and whether the grinder suits the intended brewing method.
A beginner scale does not need to be smart
Resets the displayed weight after the brewer, cup or container is placed on the scale.
A delayed reading makes it easy to pour beyond the target before the display catches up.
The brewer should rest safely without hiding the display or creating an unstable stack.
Fine readings are especially useful for espresso; ordinary filter recipes can tolerate less precision.
When a gooseneck kettle earns its space
Immersion and uncomplicated brewing
French press, steep-and-release brewers and many AeroPress-style recipes do not require a narrow pouring stream. The water is added quickly, and the coffee remains immersed for a set period.
Spend the difference on a better grinder or fresher coffee before replacing a safe kettle that already performs the job.
Controlled pour-over
Pour-over recipes often benefit from a slower, more directed stream. The narrow spout makes it easier to control where water lands and how quickly the brewer gains weight.
Temperature control is a separate feature. You can choose a basic gooseneck, a temperature-controlled model or continue using an ordinary kettle until pouring becomes the limitation.
Espresso is a separate equipment category
Buying an inexpensive espresso machine without budgeting for a suitable grinder often creates a difficult setup. The grinder controls resistance through the coffee puck and may influence consistency more than many decorative machine features.
Choose one with a basket size, warm-up routine and maintenance process you are prepared to learn.
It must grind finely enough and provide small adjustments for controlling shot flow.
It should fit beneath the cup and measure the dry dose and liquid espresso yield.
Use the supplied tool at first unless it fits the basket so poorly that tamping level becomes difficult.
Choose a size that matches the amount of milk normally steamed rather than the largest option.
A group brush, suitable cleaner and descaling routine matter more than several puck accessories.
Useful later, but not essential on day one
Helpful when comparing roast levels or repeating exact recipes, but unnecessary for learning coffee-to-water ratios.
Useful for larger pour-overs and serving several people. A heat-safe vessel you already own may perform the same function.
Add another method after you understand what your first brewer does well and which experience is missing.
Interesting for experimentation, but they add work and do not repair an unsuitable grinder.
Flow graphs and saved recipes are valuable only when you intend to review and use the recorded data.
Tubes and countertop containers may look organized, but protection from air, heat and moisture matters more than appearance.
The small cleaning kit that protects every other purchase
- Soft grinder brush
- Clean microfiber cloth
- Brewer-safe dish brush
- Manufacturer-approved cleaner
- Replacement filters
- Machine-specific descaler when required
Old coffee particles and oils can become stale, block grinder pathways and alter the flavor of later brews. Remove loose grounds regularly and follow the manufacturer’s instructions before opening an electric grinder or using cleaning products.
Do not submerge electrical equipment. Keep burrs dry unless the manufacturer explicitly instructs otherwise. Avoid improvised grinder-cleaning materials that may damage the burrs or affect the warranty.
A clean inexpensive brewer usually produces a more pleasant cup than a neglected premium one.
Design the counter around movement
A practical setup follows the order in which coffee is made. Keeping frequently used tools together reduces spills, forgotten measurements and the temptation to stop using the equipment.
Store the active bag, brewer filters and measuring accessories within easy reach.
Keep the grinder beside the scale so beans can move directly from bag to measured dose.
Place the kettle and brewer near a safe outlet and away from the edge of the counter.
Keep a cloth, brush and nearby route to the sink or grounds container.
Use one recipe before buying another tool
- 15 g whole coffee
- 250 g water
- Medium grind to begin
- Water suitable for drinking
- Record total brew time
This approximate 1:16.7 ratio is a neutral starting point, not a rule for every brewer. Prepare it several times before deciding that the setup needs another accessory.
When the cup tastes sharp and drains quickly, test a slightly finer grind. When it tastes drying or excessively bitter and drains slowly, test a slightly coarser grind. Keep the dose and water amount unchanged while comparing.
A new tool is justified when the current equipment cannot make the required adjustment or repeat the successful result.
Beginner shopping checklist
Select only the items required by the brewing path you chose.
Can a beginner start with pre-ground coffee?
Is a blade grinder better than buying pre-ground coffee?
Does every beginner need a thermometer?
Should I buy a grinder that handles both filter coffee and espresso?
The smallest useful setup is usually the best first setup
A capable beginner station can be only four main objects: a brewer, burr grinder, scale and kettle. Automatic drip may reduce that further by handling water delivery and heating in one machine.
Buy equipment according to the drink you make most often, not the coffee identity you hope the counter will display. Learn one recipe, adjust the grind and keep the tools clean.
When the setup produces a cup you enjoy repeatedly, it is already complete. The next purchase should solve a real limitation—not create a reason to reorganize the kitchen again.
Equipment and maintenance references
- Specialty Coffee Association — Certified Home Equipment . Official program describing third-party testing of home brewers for brewing quality, consistency and performance.
- Breville — How to Use a Coffee Grinder . Official manufacturer guidance covering burr and blade grinders, grind adjustment, weighing coffee and matching grind size to brewing method.
- Breville — How to Clean a Coffee Grinder . Official maintenance guidance covering coffee residue, burr cleaning, electrical safety and following model-specific instructions.
The external references above were active and accessible during this editorial review. Product availability and features can change, so this guide focuses on equipment functions rather than recommending temporary models or prices.
The Bruxa Coffee editorial team creates practical guides, brewing resources and interactive coffee tools designed to help readers brew better coffee at home. Our content focuses on clear explanations, reliable information and hands-on brewing knowledge for coffee enthusiasts of all experience levels.